Re-seating on the engine stand
The original setup I had for the engine on the stand had the mounting bracket on an angle. I wanted it to be aligned when I set the locking pin. Back onto the crane so I could futz around with the mounting arms configuration. Below is what I settled on.One thing to note is that the Harbor Freight engine stand and crane don't seem to play well with each other. The bottom legs of the crane aren't spaced far enough apart for the engine stand base to get close enough. It was always a pain in the ass when trying to transfer from the crane to the stand and vice versa. It would probably work if the crane was on a higher level than the stand, but I'm sure most people have, like, floors.
Intake manifold removal
Next task was to remove the intake manifold. I ended up taking off the fuel injector rail as well. It'll eventually need a good cleaning from the looks of it. |
| So how am I going to get that fuel rail out? |
 |
| Yuck! |
 |
| Setting this aside to clean later |
 |
| Fuel Injectors |
Timing belt removal
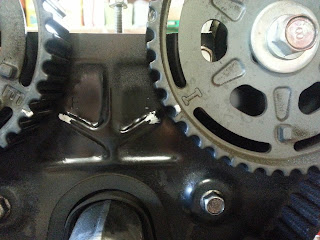
 Removing the timing belt covers exposed a bit more gunk, but the belt itself looked in pretty good shape. The crud around the lower half of the block was caked on pretty good. More cleaning in my future!
This being my first time doing something like this, I'm preceding cautiously and getting acquainted with all the parts and where they should go. Taking lots of pictures along the way.
 |
 |  |
The crankshaft pulley
Reading up on how to remove the crankshaft pulley, I found out I'd need a special tool. Doing a little digging online I found others who made their own tool and that was the route I was going to take. But first things first. Needed to line up the cam sprockets. (Actually, in retrospect I don't think really needed to do this because I would eventually rip the whole thing apart. But at this stage, I wasn't sure I was going to go that far.)
Here's the new tool I "built"for removing the crank pulley. Didn't want to buy a special tool just for this, so I took apart an old pair of hedge trimmers and cut and bored the blade to fit. The arm was long enough to get enough leverage. It took awhile to grind that sucker down, but it worked fine.
The crank bolt was on there pretty tight and it killed a shitty ratchet I had. Eventually I used an old beam torque wrench I had. (I don't have a breaker bar and I was a little too impatient to buy one.) It finally broke and the bolt came off without much more fuss. However, the pulley boss was pretty stuck on there. Not sure what to do about it, I sprayed it with more weasel piss and back to Google, I went...
Side Note: Using the compose mode of Blogger is pretty much brain dead as far as I'm concerned. I spent waaaaayy more time trying to get these images where I want them to be on the blog and am still not satisfied. I expected something more WYSIWYG, but this is definitely not that. I really don't want to spent a bunch of time cobbling HTML. I can do it, but then I'm concentrating on the wrong thing here. *sigh* </rant>


No comments:
Post a Comment